Upload images and gifs to buttons ✨
Take your interactive video game to the next level with your own custom image buttons
Find out how below, or skip ahead to the FAQs.
✨ Get this feature during your 7-day free trial of Stornaway – then unlock its full creative power by upgrading to any of our subscription plans.
🔼 How to upload your image file
You can use pretty much anything you want. We support the 3 main types of web image files: png, jpg and gif.
In the settings sidebar, in the section for each choice, you’ll see “Button images” – click to open this and you’ll be able to upload an image which will show as the button for that choice.

🎨 Using Adobe Express to create your buttons
Using our Adobe Express integration, we’ve made it easier than ever to create custom button images directly within your Stornaway projects.
With just a few clicks, you can launch Adobe Express from inside Stornaway, design engaging and branded button graphics, and seamlessly save them back to your project – no downloads or uploads required!
🗺 Put your choices anywhere on the screen
With our button position editor, you can move the buttons to wherever you want to on your screen.
Use the “edit positioning” option to place your buttons where you want on the screen – it’s as simple as dragging and dropping the buttons.
✨ Alter the size of your buttons
To get the sizes right for your buttons, use the “Button width / height” settings in the sidebar.

The percentages are concerning the player screen size. This means that whatever screen your viewer is watching on, the size and positions of the buttons remain relative.
🖼 Get making: how to create or edit your own button images
Use any image editor to create and resize your images – Photo Editor comes free with Windows, Preview comes free with Mac. Adobe Express and Canva are free online editors. Adobe Photoshop is the most widely used professional tool.
If you’re not sure, we recommend using Adobe Express because it’s integrated into Stornaway and available on the web.
To create or edit an image with Express, either make a new image at 250px wide by 150px high, or upload something you already have and resize it to that size using the resize tool.
To make a transparent background, click the background icon above the image, and choose “No Fill”
You can use their “Image background remover” to remove backgrounds from people or objects.
Then download as transparent png.

FAQs about using button images
PNG? JPG? GIF? What image file should I use?
You can use pretty much anything you want. We support the 3 main types of web image files: png, jpg and gif. Webp files aren’t supported by some of the mobile, VR and game apps you can make with Stornaway, so we don’t allow webp for now
A JPG – also known as JPEG or Joint Photographic Experts Group – is the most commonly used file for compressed, digital images. Traditionally, they are the smallest size in terms of data. Because of the type of compression used in a JPG, some ‘unnecessary’ details in the image may be lost.
It’s the perfect file for simple, still images.
The image below – taken from an interactive pub quiz created in Stornaway.io – uses JPG files for the button images.

A PNG – Portable Network Graphic – is a file that retains all of its data even when it has been compressed. Which means it has a lot of information included in it.
Whilst this makes for a slightly bigger file, the benefits of this extra detail can be huge. For your button images, key specificities around opacity and transparency are contained within the file.
So if you want to your users to press a button that is an isolated object, a logo, an avatar – this is the file choice for you.
Below, a festive, interactive party invite uses PNG buttons of happy & sad gingerbread men for the viewer to click on to confirm their attendance.

A GIF (some people call it “jiff”) stands for Graphical Interchangeable Format. It was created in order to show short, moving images online with a small file size.
They are perfect for animated images, logos, and reactive buttons.
Below are two examples of this in use:
First up, a GIF of a button being chosen – the button then depresses like it would if you physically pressed a button.
Secondly, in an interactive pub quiz – created in Stornaway – the viewer is presented with two, animated choices. Once the viewer clicks the GIF button, a second GIF is shown, like a loading screen.
How do I hide the button text that appears on the top of my image?
The text displayed in your custom button text fields – or the linked island names – will be displayed on top of your custom button image as default.
If you don’t want this, you can either:
Put a blank space in the custom button text field

Or, if you want to keep the text for screen readers, set the text to 0% opacity using the bottom slider in the Text Colour setting

What is the secondary button image for?
Once your viewer has clicked a button, you may want to reward them with acknowledgement of that choice or perhaps even praise them for making the right choice. You may simply want to show that they have made a selection.
The secondary image upload option allows you to do that.
Below, in an interactive pub quiz made in Stornaway.io, the button changes to a “getting ready” GIF – almost like a “loading” screen once the viewer has made a choice. Adding anticipation for the quiz that is about to start.
Another example, from the same project, uses the secondary image to alert the viewer that they have answered a question incorrectly.
What size should the images be?
We recommend starting with 250px wide by 100px tall.
These will fit neatly into the standard button styles, if you have 2 or 3 choices.
If you have a slightly taller or wider button, you can experiment with increasing this. 300px x 150px will fit nicely.
See below for a guide on the different button sizes to use with different Stornaway button style layouts like Split Screen and Quadrant.
Using hotspots with button images
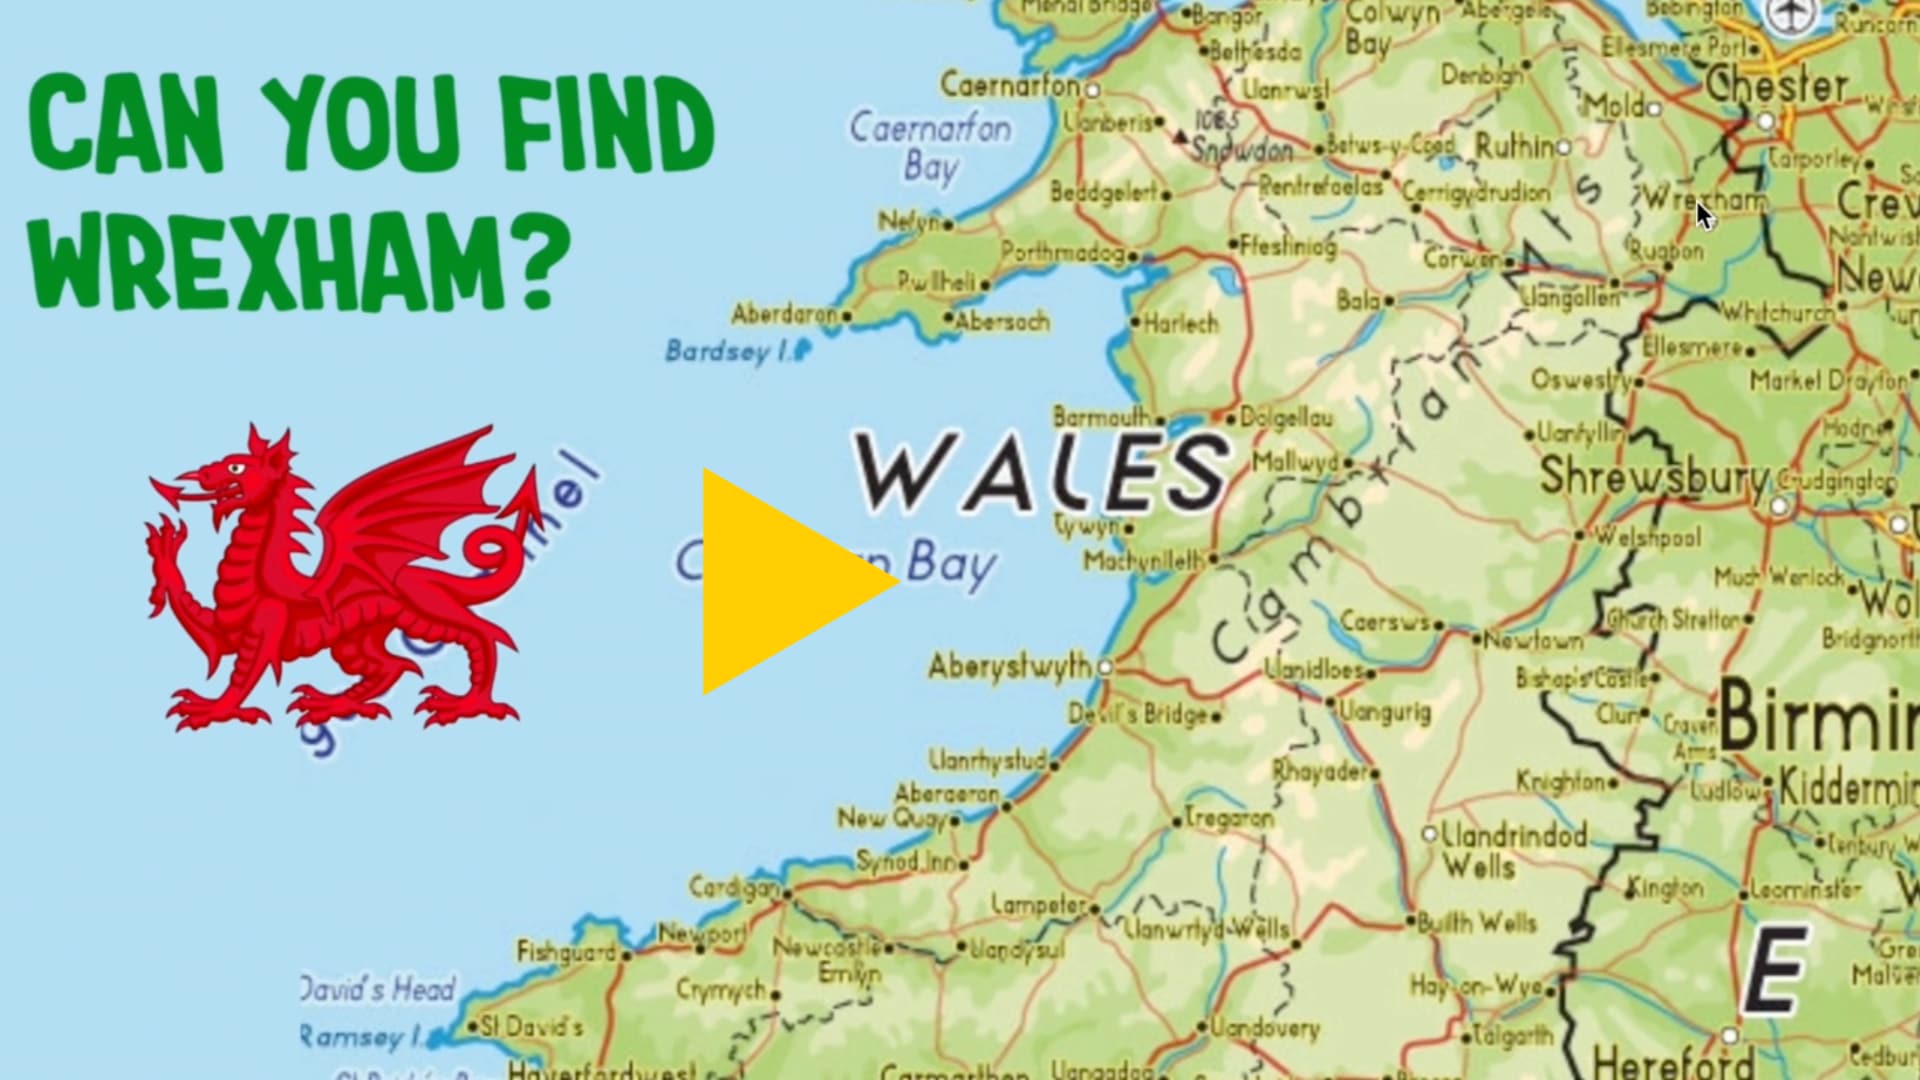
You can use hotspots to create areas for your viewer to click. This could be for a “guess the location” quiz, a “find the item” game or perhaps you want to make the most of the specific button that already exists in your video.
This simple quiz shows you how effective it can be to have the viewer find something on the screen that hasn’t necessarily got a super obvious button on it.
The best way to do this, is to have the button UNHIDDEN whilst you position it and then click the “hide button to create hotspot” option after you’re happy with the size and placement of the button.
This quick video below shows you how you can place a hotspot on a map to ask a viewer to “find” a location.